I've always wanted to build a stock prediction algorithm. I know for a fact that it's incredibly hard to have a profitable trading bot using only historical price as data point. This is just due to the mere complexity of the financial system and how many variables are at play. (More about this at the end of the article)
Moreover, here my goal was to learn how to implement a complex machine learning strategy into a web app - from start to finish.
Table of contents
- Choose the stack that I'm going to use
- Sketch the app structure
- Gather price data from an API
- Design the AI pipeline in jupyter
- Export the AI code in a python file for Flask
- Quickly design the front-end of the application
- Connect the pieces together
- Check the results
Let's get started!
1. The Stack
This project was made from scratch in Python. Here's all the details of the implementation:
Flask as web framework
Alpha Vantage as stock data API (free price data 20 years back, day to day)
Tensorflow as AI library
Matplotlib for quick visualization of the predicted result.
Overall, I find Flask to be incredibly quick for prototypes and simple apps. Another advantage is that I'm using Python on the backend, which happens to be very well supported for machine learning and data manipulation libraries.
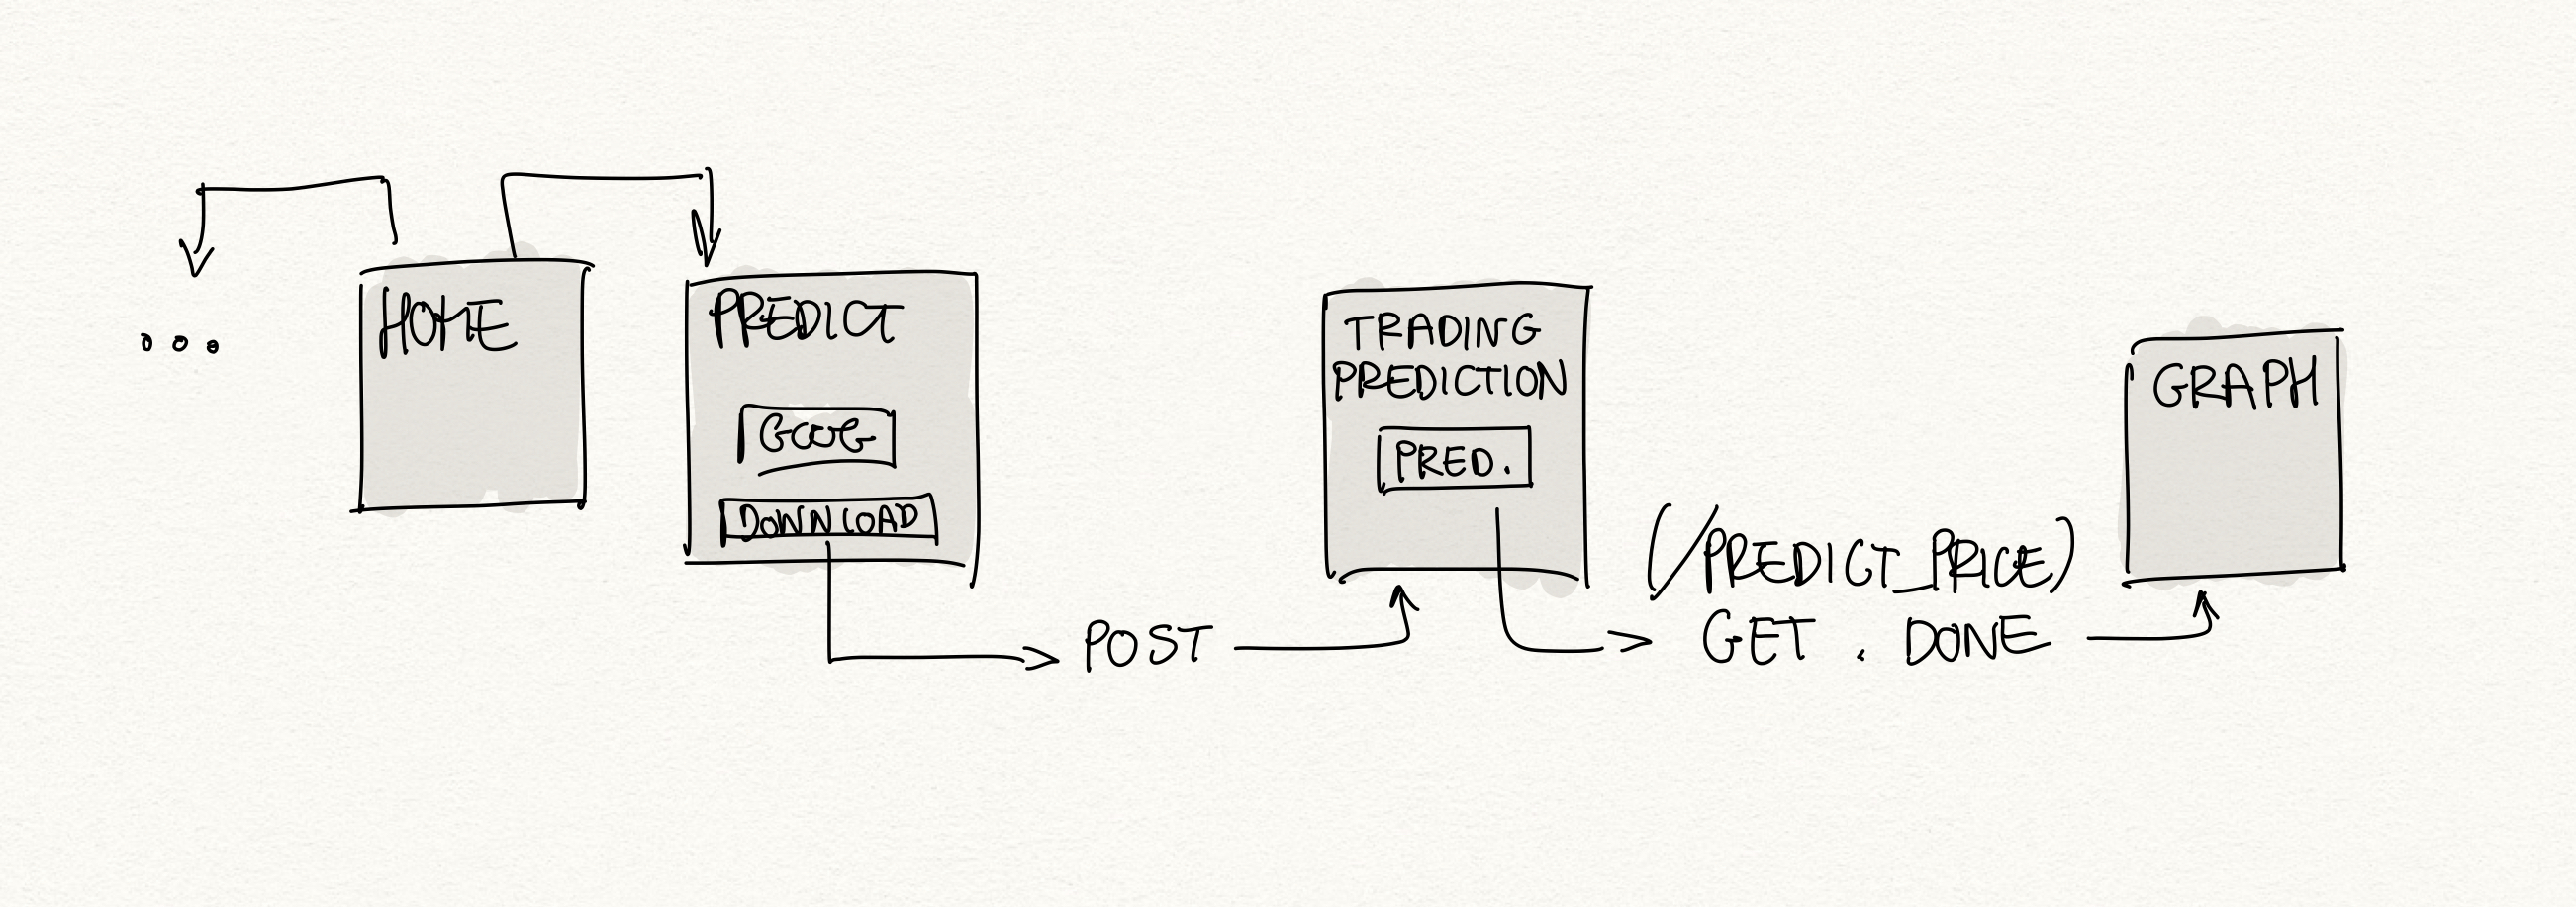
2. The App Structure
Because this was meant to be a 1-day project, the web app is bare-bones. The app structure I used is the same as my Digit Recognition project, so I didn't waste time on things like user login, registration, and a decently crafted homepage since I had already made those.
3. Gather price Data from an API
Upon a quick online search I found some free APIs for stock price data. The Alpha Vantage API in particular, returns price data from the past 20+ years, on a end-of-day basis, with a simple wrapper made for Python:
from alpha_vantage.timeseries import TimeSeriesdata, meta_data = ts.get_daily(symbol=stock, outputsize='full')
Then, the data can be saved to a csv on the file system, and it looks something like this:
date,1. open,2. high,3. low,4. close,5. volume2019-11-25,216.04,221.0,215.52,220.82,5082206.02019-11-22,211.09,212.9633,209.94,210.89,5602470.02019-11-21,211.0,213.24,209.31,210.18,7209730.0
I initially thought this step would take quite some time, but thanks to the python wrapper this process was really quick.
4. Design the AI pipeline in Jupyter Notebooks
This was the reason I even started this project: I wanted ot have fun with complicated neural network models, so I chose an RNN. This algorithm architecture is fascinating yet pretty hard to understand.
Even though knowing how the algorithm works isn't a pre-requisite to building stuff these days thanks to the many deep learning libraries available, I recommend learning what is involved in the LSTM cells architecture.
The network uses 4 LSTM layers, which have a "60 day memory". This means that every time my network wants to predict the price for a day, the network remembers the prior 60 days as well as the usual time-series prediction.
Here is how I set up the network architecture:
regressior = Sequential()regressior.add(LSTM(units = 60, ...)regressior.add(Dropout(0.2))regressior.add(LSTM(units = 60, ...)regressior.add(Dropout(0.2))regressior.add(LSTM(units = 80, ...)regressior.add(Dropout(0.2))regressior.add(LSTM(units = 120, ...)regressior.add(Dropout(0.2))regressior.add(Dense(units = 1))
I played around with some parameters like epochs and layer units, but to be honest I didn't waste much time on that, because I knew that my efforts would've made an insignificant change in accuracy.
5. Export the AI code into Flask
This step was very new to me. I can work inside Jupyter notebooks but I'm not sure how to export the working code into an actual file on the backend. At the end I found it to be quite easy, I mostly copied and pasted the code from my notebook, but some extra steps were necessary, like imporing and exporting the right functions, dependencies, and other web-development related tasks.
6. Quickly implement the front-end of the application
I'm using Bootstrap to waste as little time as possible on styling. In the future I want to experiment with more front-end frameworks and libraries, but for now I felt like this option was the quickest and I was able to deliver decent results very quickly.
7. Connecting the pieces together
This step involves writing some Javascript to make requests to the backed whenever some buttons are pressed on the frontend. There are several ways to do this. My idea was to simply call an URL route to download data and another one to trigger the model training.
8. The results
After some experimenting, I found out 25 epochs to be enough training, because the loss wasn't improving much and my laptop was about to explode. Ok... mainly for the second reason... Anyways, I want to show you the results I obtained:
On this graph, the red line represents the actual stock price, while the blue one represents the predicted price. The time period was from January 1st, 2019 to today, around 10 months later at the time of posting this article.
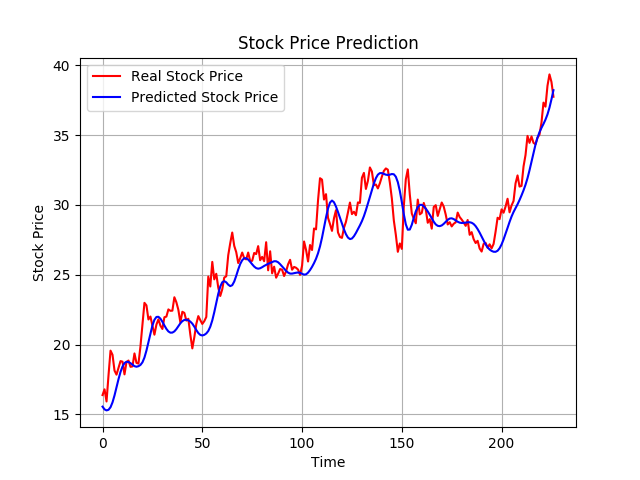
I need to emphatize that this was only a limited experiment and that sometimes the algorithm didn't do very well. In fact, most of the times the prediction was under-performing with regard to the actual price. I speculate that this may be caused by some market volatility multiplier that is completely unpredictable using time-series data.
Think of it like driving your car while looking only at the rear-view mirrors. I like this analogy because most financial decisions have very little to do with historical price. For example, think of earning calls, or just some unexpected scandal. In that case the stock price becomes the reaction to some other event, rather than the cause.
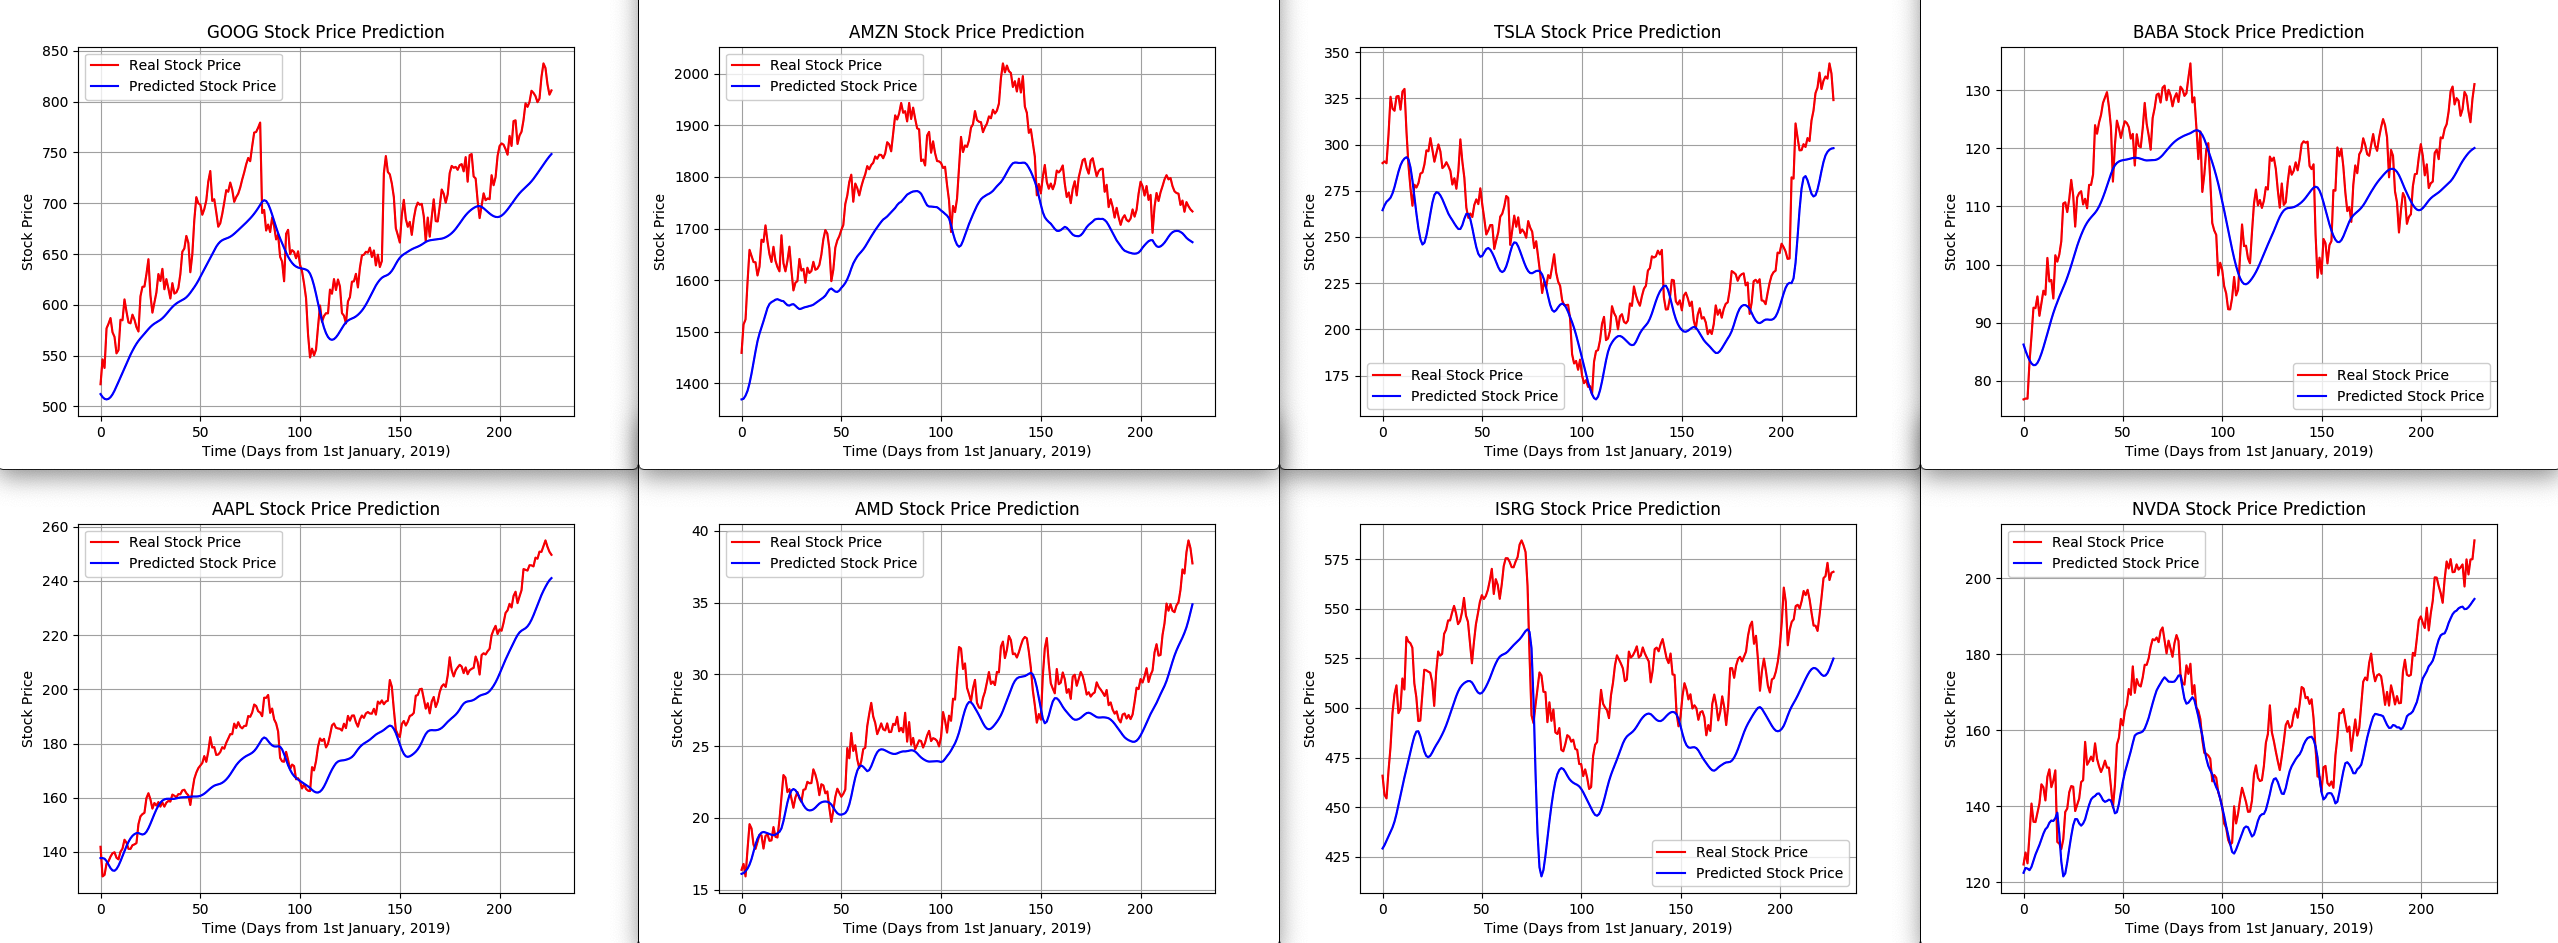
Here are the results for some other stocks:
The code for this project is available on Github here:
Github project repository
github.comThank you for reading ✌️.